Installation Guides
Geometris 6 or 9 Pin “Y” Cable

Installation Instructions for the Geometris Tracking Devices with the 6 pin or 9 pin “Y” Wiring Cable
Tools required: Phillips or Torx head screwdriver & zip ties (provided in package)
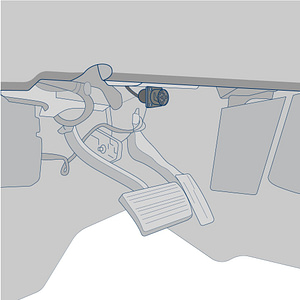
Find the vehicle’s 6 or 9 pin port location. It is typically below the driver’s side of the dashboard or in the center console. The existing plug’s mounting type may vary by vehicle.
Remove the vehicle’s existing 6 or 9pin connector from the plate with a phillips or Torx head screwdriver.
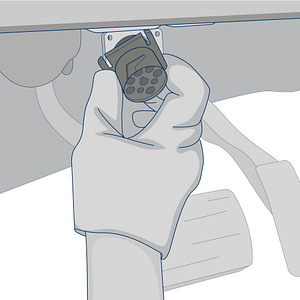
Remove the vehicle’s female 6 or 9 pin port from the plate.
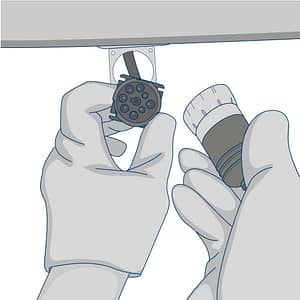
Plug the male adapter from the device’s harness into the vehicle’s female 6 or 9 pin plug.
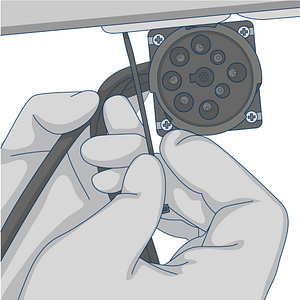
Use the male plug from the tracking device’s harness to replace the vehicle’s 6 or 9pin plug. Use the screwdriver to mount the new plug onto the vehicle’s mounting plate. Plug the vehicle’s OEM 9pin port and plug it into the rear plug of the tracker’s wiring harness.
Zip tie any excess wire to a wire loom behind the dashboard.
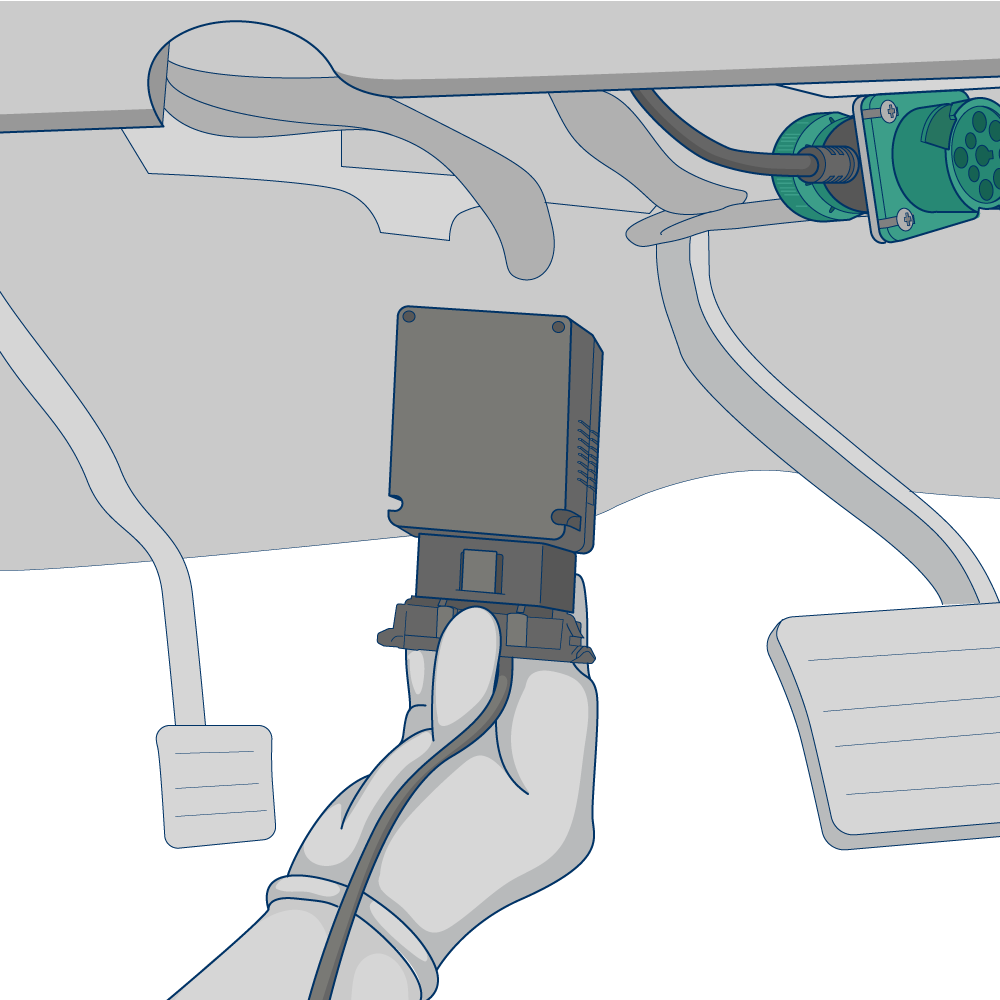

Plug the rectangular plug into the device and find a secure location below the dash board to mount the device. Use zip ties to secure it to a wiring bundle or to the vehicle’s frame to ensure that it does not slip out while the vehicle is in operation. Mount the device with the identification labels faced upward to ensure the best satellite reception. The QR code sticker should be facing down.
Required Information
Record the serial number for the device and the VIN/Year/Make/Model of the vehicle on your worksheet for activation.
Device Testing & Troubleshooting Guides
Select the device manufacturer displayed on the label.
Geometris