


- July 6th, 2026
- Matthew Villaflor
How Fleet Dash Cams Provide Iron Clad Evidence Against Distracted Vacation Drivers
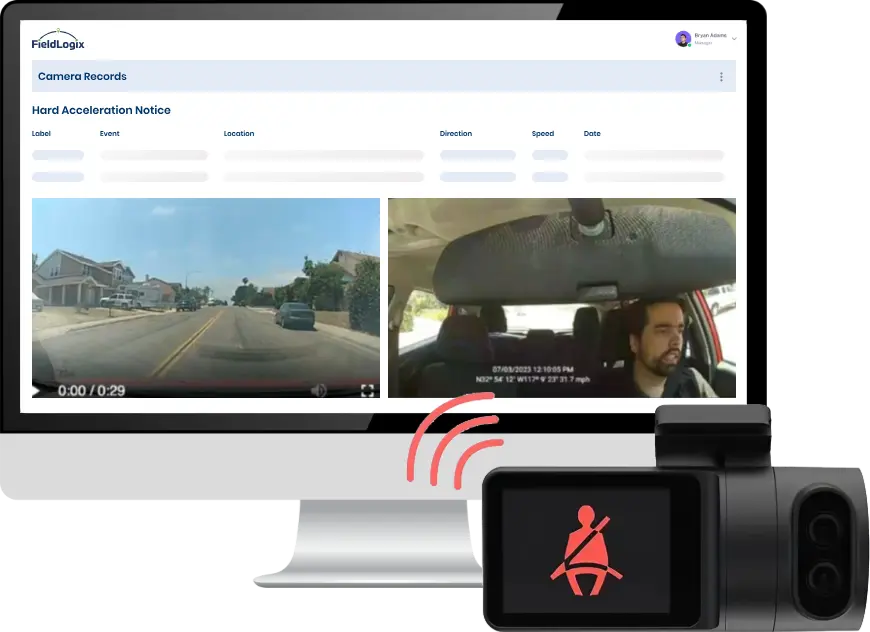
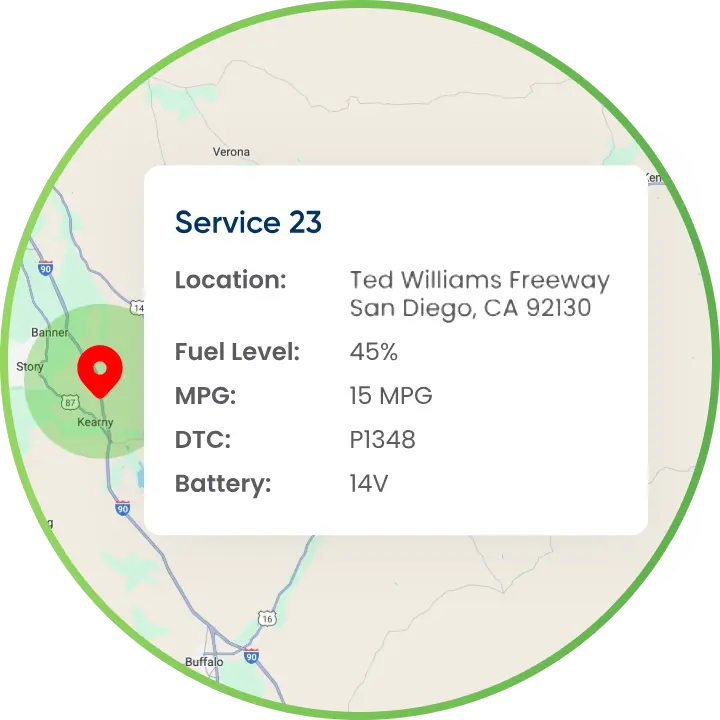
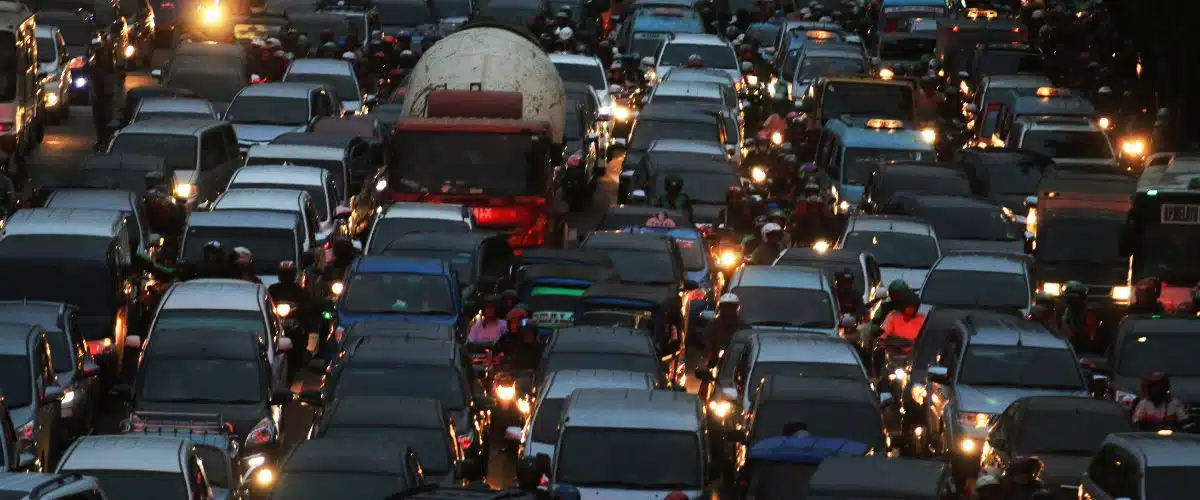
For most of the year, the fleet dash cam mounted behind your windshield is a quiet insurance policy. You install it, you forget about it, and you hope that you never have to pull a single second of video footage from it. In July, that calculation changes completely. During the first 2 weeks of July, […]


This has been an excellent experience for us
"Much more user friendly, better features and lower cost. Wins across the board."
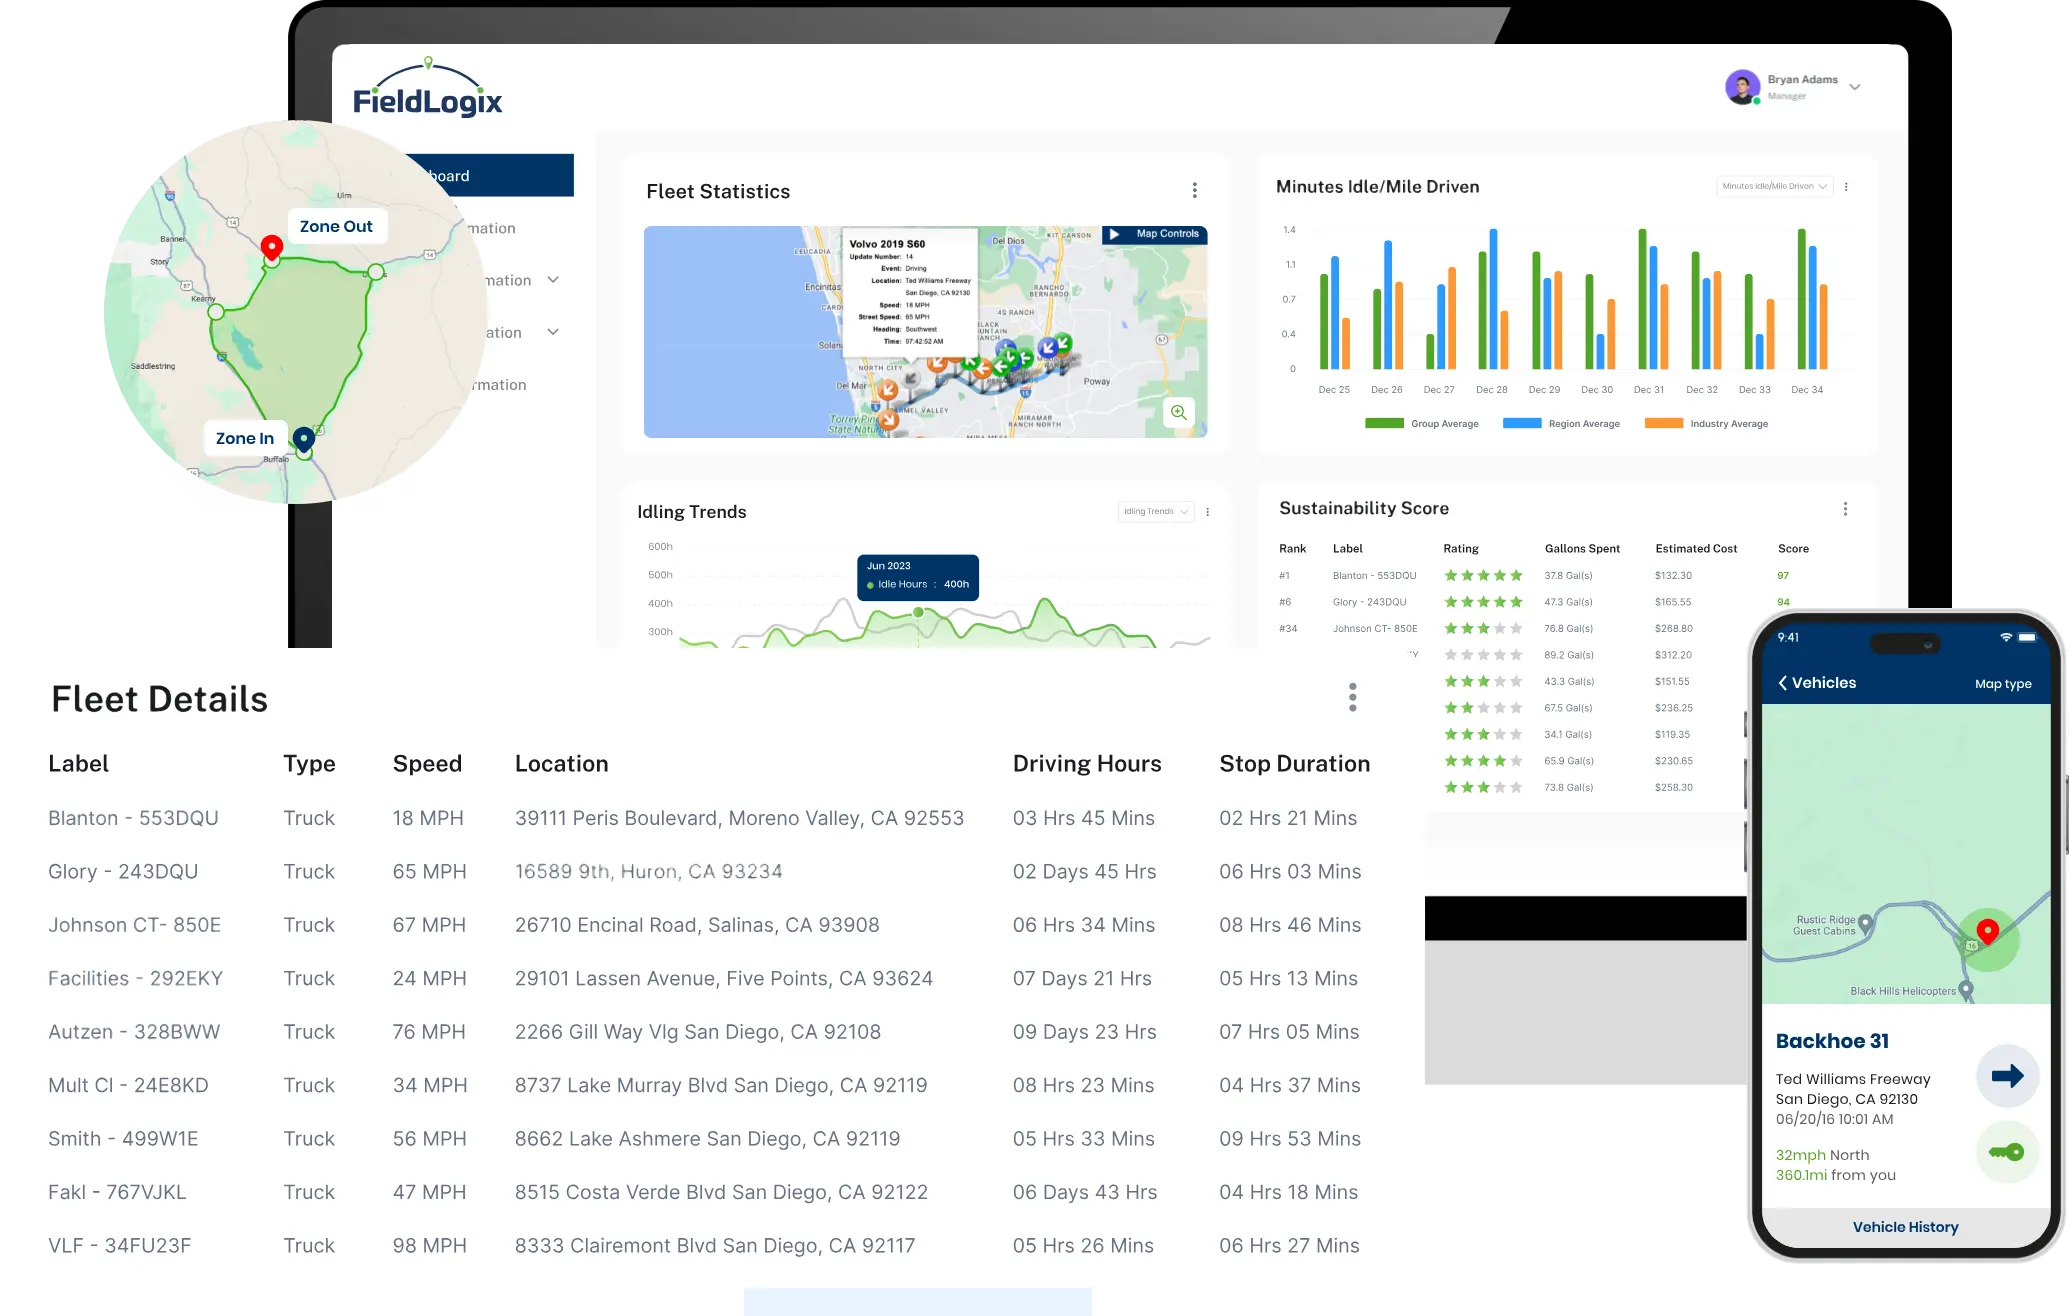
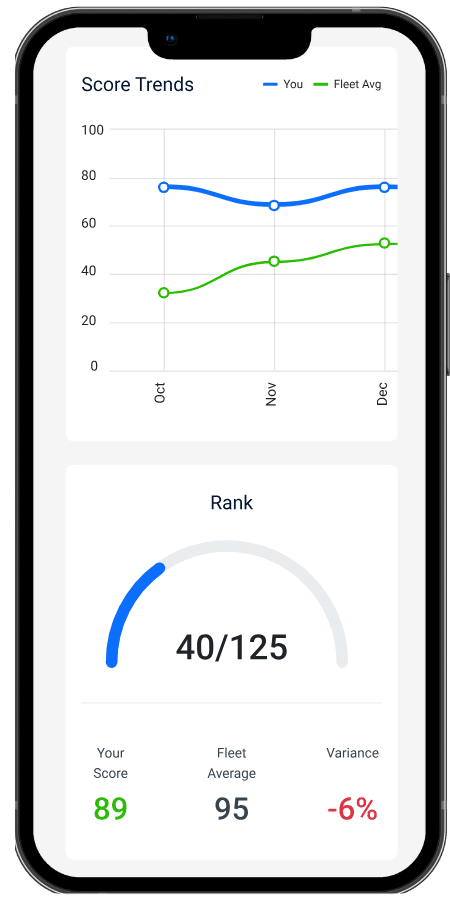
FieldLogix Improves Our Fleet's Safety
“The FieldLogix system works great! We have techs slowing down left and right after having their units installed.”
Makes our routes more efficient
“FieldLogix allows us to follow breadcrumb trails to make sure drivers are using efficient routes and it gives us live updates on which job sites they are at or are going to.”