FieldLogix & Microsoft Active Directory Single Sign On
FieldLogix telematics Single Sign On solution supports user access through Microsoft Active Directory. This is helpful for organizations who wish to manage all of their user access rights to FieldLogix through a single management platform.
Our supported identity provider is Microsoft Active directory and we use MS Active Directory Federation Services for Single Sign On. Supported authentication methods are Oauth v2 and OpenID.
Your use of FieldLogix is governed by our our licensing agreement and privacy policy.
Prerequisites
- A Microsoft Azure account with Azure AD activated
- Permissions to add and manage AD Enterprise Applications, Single Sign On Users, and Roles.
- A FieldLogix account.
- FieldLogix administrator access with “Edit all Users Ability” and “Full Fleet Access” enabled.
- All of your users in your FieldLogix account will need an account in Azure Active Directory that is setup with the exact the same email address as their FieldLogix username. (Azure AD will not create user accounts in FieldLogix)
Permissions required for Consent
By connecting FieldLogix to Active Directory, you are granting Microsoft AD the following permissions:
Log into the FieldLogix portal
Read users profiles
Email address
First & last name
Timezone
Record system access logs
Origin IP address
Pages accessed
Date/time accessed
Browser name
This information is required in order to allow the user access to the FieldLogix system through MS AD Single Sign On.
Setting up FieldLogix users for Single Sign On
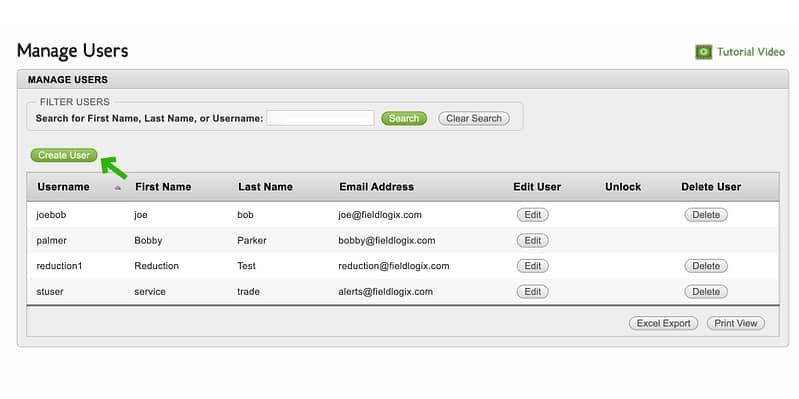
Log into FieldLogix and go to Settings > Manage users and click Create User
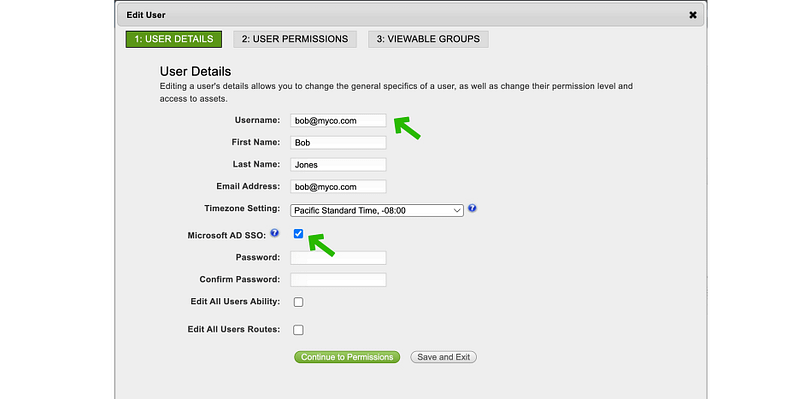
Enter the user’s Active Directory email address as the FieldLogix username, then enterthe remaining user details and click the “Microsoft AD SSO” checkbox and complete the user setup or click Save and Exit.
Configuring MS Azure Single Sign On for FieldLogix
To configure the integration of FieldLogix into Azure AD, you need to add FieldLogix from the App gallery to your list of managed SaaS apps.
Sign in to the Azure portal using either a work or school account, or a personal Microsoft account.
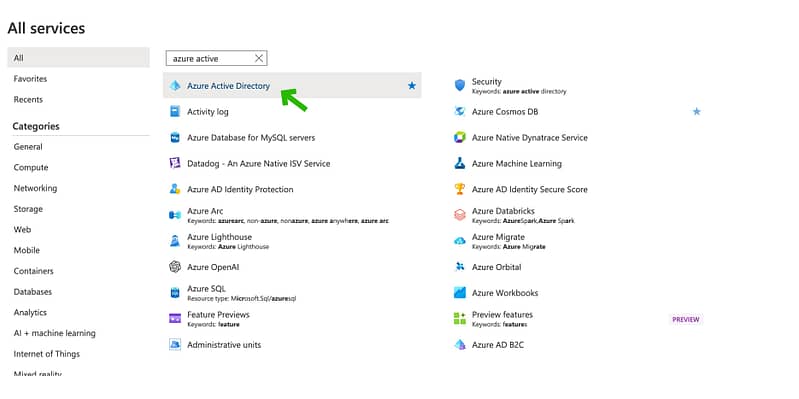
Select the Azure Active Directory service or search for it in the search box.
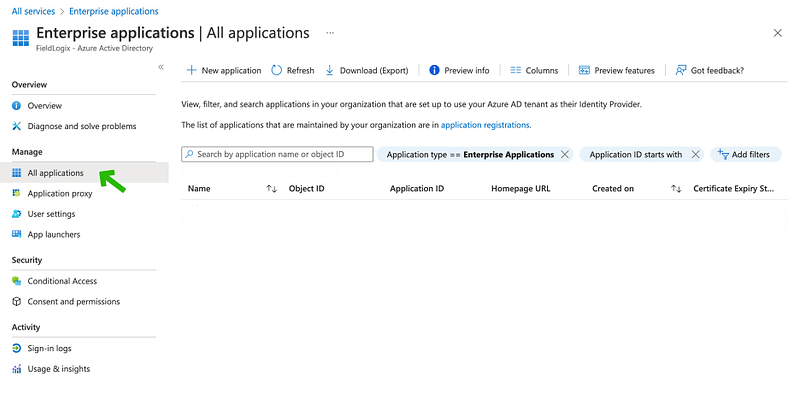
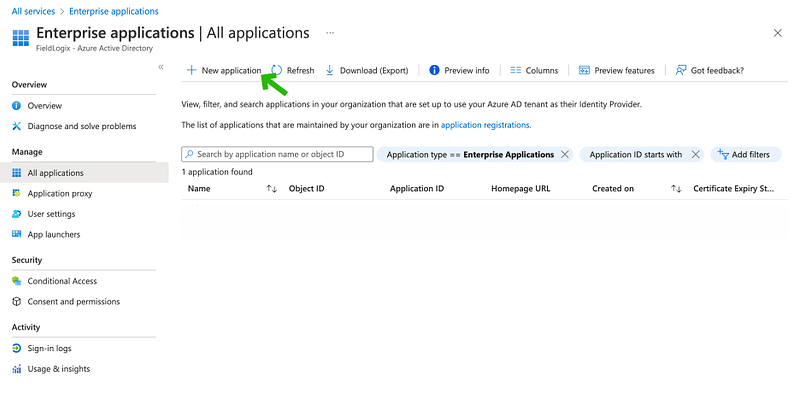
Navigate to Enterprise Applications and then select All Applications.
To add a new application, select New application.
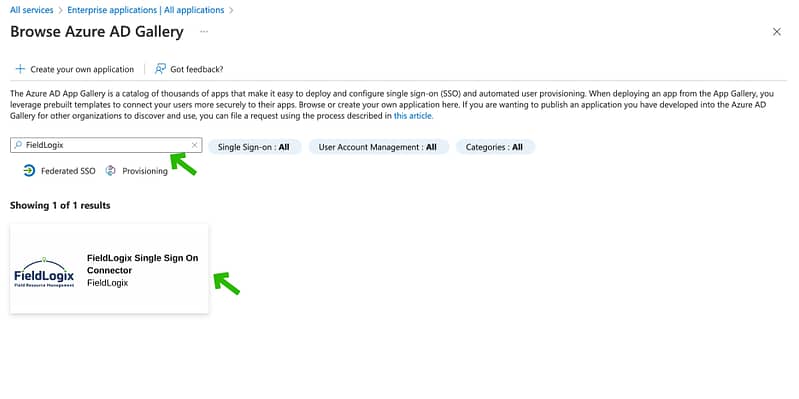
In the Browse Azure AD Gallery section, type FieldLogix in the search box and click on the FieldLogix card in the results.
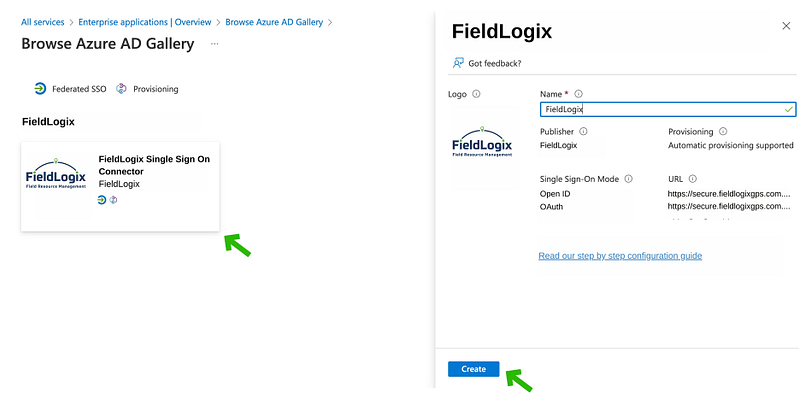
Click the Create button displayed on the right side of your screen. Wait a few seconds while the app is added to your tenant.
Setting up Initial Test Users
Test two to three users in your Active Directory tenant prior to deploying Single Sign On to your entire user base.
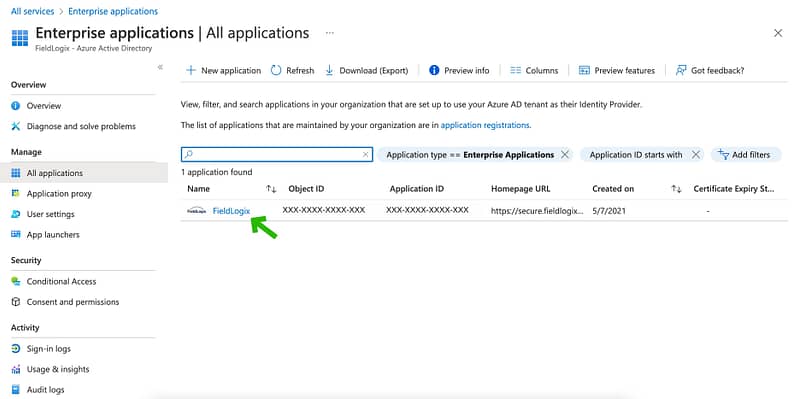
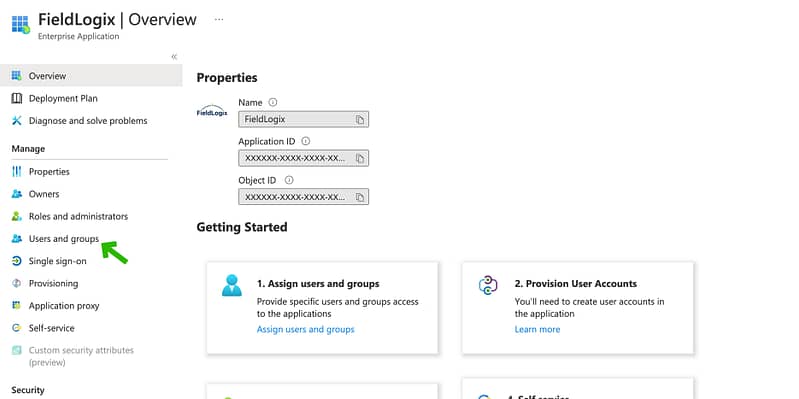
After your instance is created go to All applications and click on the FieldLogix application name
Click Users & Groups in the left navigation pane
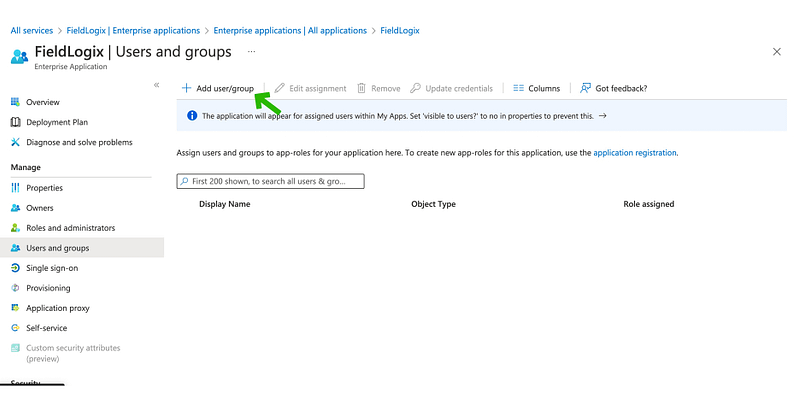
Click the Add User/Group option
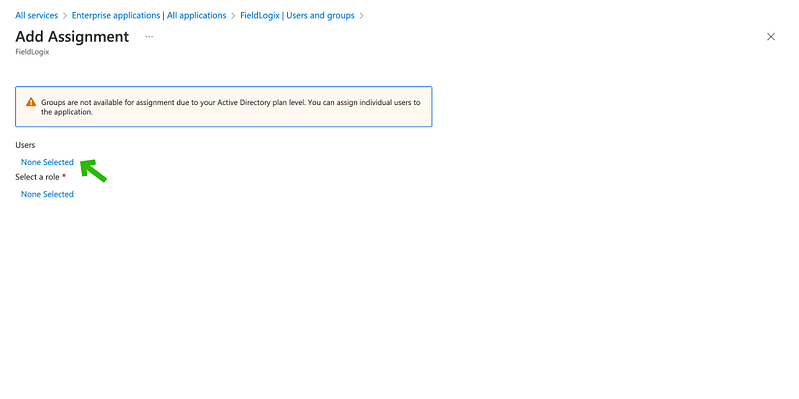
Under Users, click the “None Selected” link
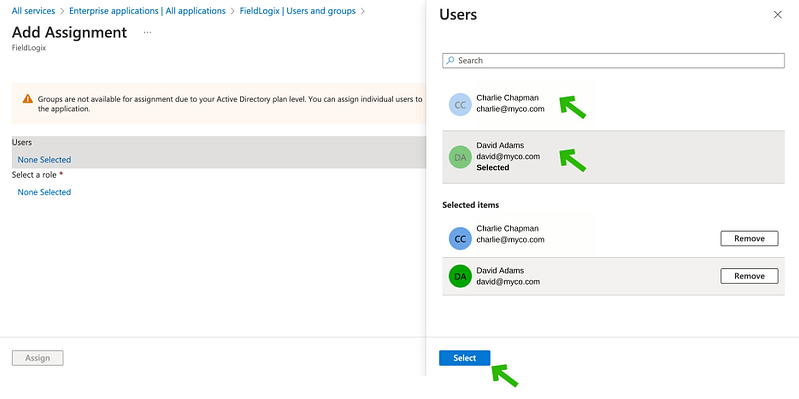
Select the users from the list in the right pane that you wish to add and click select
Under Roles, click the “None Selected” link
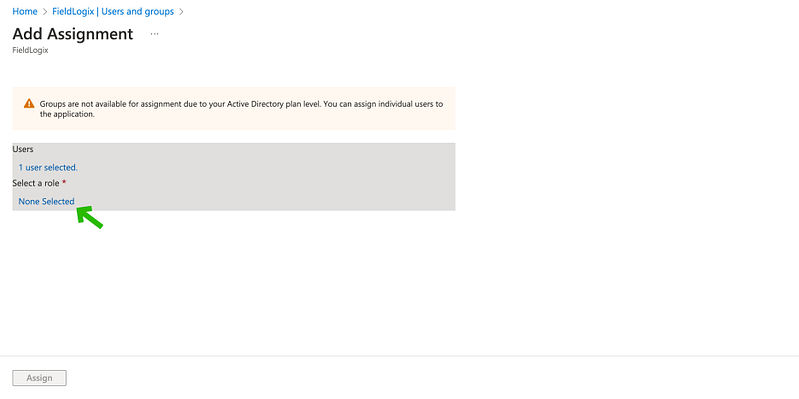
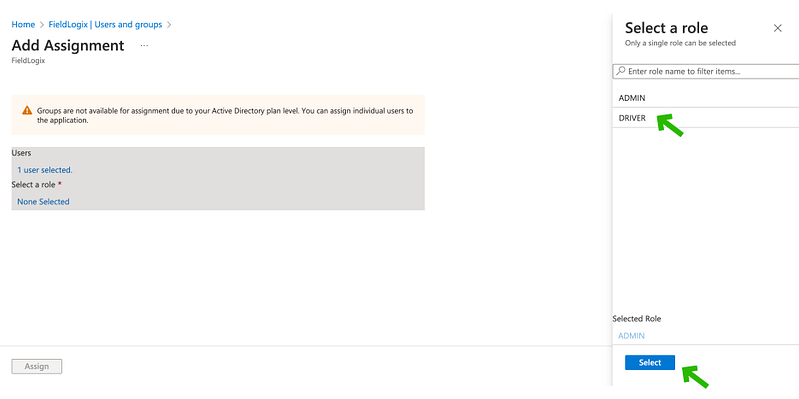
Select the Roles that you wish to assign to the user.Note that the ADMIN role is applicable to the users that will be viewing your drivers, vehicles, and other resources. The DRIVER role is for the Goose mobile users and will be available in a future release.
Click the Assign button
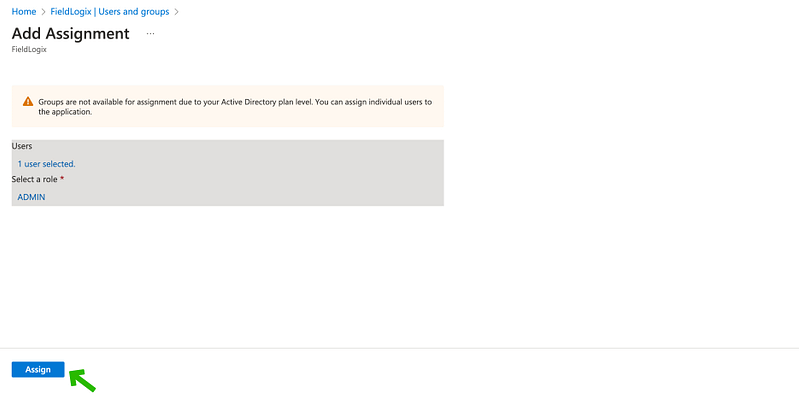
Setup Complete
This completes the setup process for your telematics Single Sign On solution.
Troubleshooting
If you encounter any issues, please reach out to support@fieldlogix.com and we will work with you to troubleshoot the issue.
Support Mechanism For End Users
If any of your end users have issues with the FieldLogix telematics Single Sign On solution, please reach out to us at support@fieldlogix.com. This will open a support case that we will manage and work with you to resolve.
You can also visit our support center at fieldlogix.com/support-center/
SCIM Endpoint
At this time, FieldLogix users and groups must be managed within the FieldLogix portal.
Learn more about Microsoft Azure Single Sign On with Active Directory.


